Monday, May 28, 2012

New Summer Tote Bag!

It feels like Summer is already here in Texas.   We've had some days in the 90s, thank goodness there has been a breeze on the days we've had to be outdoors.  I probably would have melted, lol!  One of those breezy days was on Saturday.  It was for my niece's daughters 1st birthday.....so I guess that would make her my great niece....wow that made me feel old.   I can't be a great anything at 32..... (*_*).

I love making things for people....especially my family and especially for sweet baby girls that turn one!!  Once they're one I feel like they need a new bag instead of a big ole bulky diaper bag.  Plus this bag is big and deep enough to carry diapers and wipes and whatever mom needs to carry.

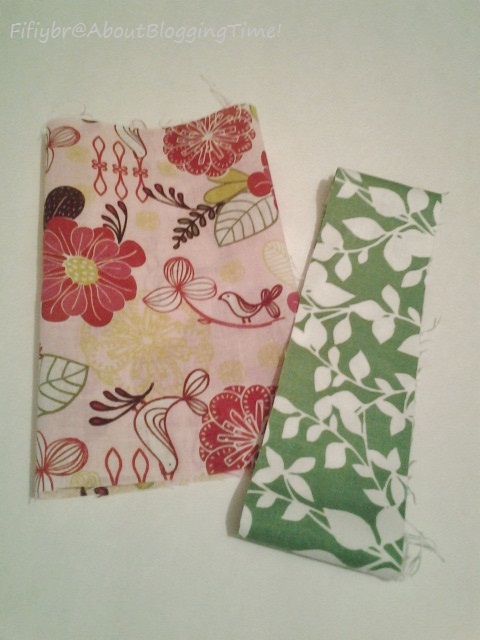
This bag was one of my favorites to make.  I love the green and pink colors.  

I'm not going into too much detail about how it was made.....check out my tote bag tutorial if you'd like.


Pockets sewn on, straps ready to be put on.


I always add a extra little some to the bag.  So I made this cute little stuffed "K" for her name.


See...cute huh!


Love, Love, Love it!!  


Here's the inside!


Now, since it was for her birthday the gift of the tote bag doubled as a gift bag.....everyone loved it!  Here it is filled with her gifts - clothes, a stuffed animal and a lady bug.   Ladybug is her nickname and that was the theme of the party.  I am a rebel when it comes to themes or registries....I hate them and I will give what I want.  So if they don't like it...oh well take it back...that's just me! (",)  But since I was in a good mood, I added the little lady bug, plus it was cute.


Here it is ready to be given away to the birthday girl!


Thanks for stopping by and checking out my weekly project!

Have a great week everyone.


Pin It

Wednesday, May 23, 2012

Pictures and Words - Wednesday 5/23

When I'm not busy doing work, work....I do things like this. 
I draw or sketch stuff in the hopes of making them into something someday.  

Annnnnddd I find inspiration in the oddest things.  For instance yesterday it was these teeny tiny little tangerines that I was about to gobble up.  I had a ah-ha moment and thought these would definitely work as "owl eyes".  See weird, lol!


Well I started drawing around the eyes and just went from there.


See...proof I was drawing this.  Who else has little chubby sausage fingers and would admit it?


I think I'm going to embroider this print.  
Plus who doesn't love Owls!

Everyone have a lovely day!!


Pin It

Monday, May 21, 2012

In full bloom - Framed Flower Art

Who doesn't like LOVE flowers???  Well you're the weird one if you don't!  My favorite flower to receive is Tulips...in any color, but my all time favorite are Yellow Tulips!  Getting flowers, any kind for that matter for no reason is always a pleasant surprise.  My second all time favorite flower is the white Peony.  Really, these are soooooo beautiful.  I love them when they are fully bloomed or just barely opening.  

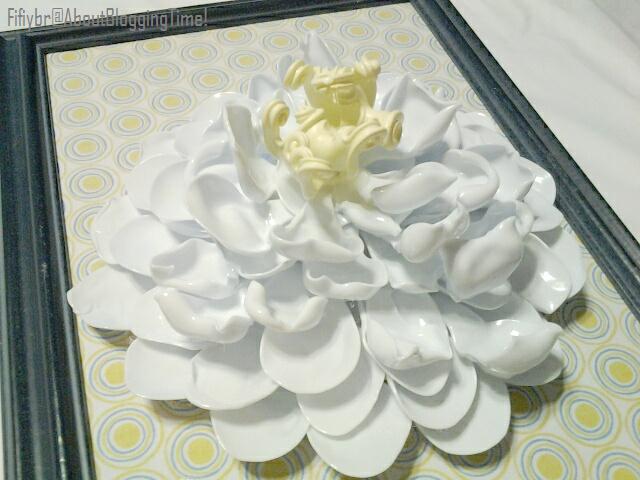
Okay, enough of my flower rambling!  I decided to make a piece of art to resemble a fully bloomed peony.  Can you guess what I used to make the flower?  I was also able to use a piece of fabric from my scrap busting bin and I also reused a garage sale find frame.

Sorry for all of the pictures....I couldn't decide which ones to show, so I just kept most of them.

Have you guessed yet?  It's really simple.


To make the flower petals was fun and easy...but the burning of my finger tips, not so much .
The flower looks like porcelain here doesn't it.


I really enjoyed making the center of the flower....after it was cooled I then spray painted it. 
You figured out what was used yet.  C'mon they're repinned all over Pinterest.


I wiped down the frame....my bestie found it for me at a garage sale for - dun...dun...dunnnnn 25¢
I cut out a piece of cardboard to fit the frame, then wrapped it in the piece fabric.  For the backing I just glued a piece of newspaper so you couldn't see all the glue and tape.  Sorry I forgot to take a picture of it.
Then I hot glued the flower onto the fabric.  After the glue dried I stood the frame up and put glue into the crevices.  I don't want it to fall off after it's put up.


It looks really great if I say so myself.  Well of course I'm gonna think that, lol!!


The three different textures used were wood, fabric and plastic!! 


Fine....
I used spoons for the petals and forks for the center! See, now you're thinking...really or whaaat!
Cool huh!!

Now it's ready for hanging.  I just have to decide how I should hang it.  The hook is at the top, the way the pic above is.  But I could easily add hooks to hang in the other way. 

Leave comments letting me know which way to hang it.
↨ upright
↔ sideways
   I'll tally up the comments next week and hang it up.

Thanks for stopping by!  Have a fabulous week!

Linking up here and many other parties!  Take a look at my Parties page.


Today's Creative Blog


Pin It