Sunday, July 14, 2013

Mini me aprons!


Why is it that everything that comes in a tinier version of something is so cute?

Here I'm sharing some child aprons that I made for my nieces.  I do holiday crafts with them and we don't want to get their clothes all dirty.  These aprons are just simple plain cotton aprons, no sewn on flowers or ribbons or anything fancy. They will be and have been stained with paints, glues, glitters, inks, flour, frosting.....everything.  I didn't want to make them where I would be worried or upset that they had gotten them dirty.  I made these aprons last year, I just hadn't had the time to make any post about it.  Since I don't have anything else ready with pictures and such, I thought I would post it now.  Sorry for the awful pics., these were the only ones I had for this project.  Plus I like to sew in the dark with just my lamp on, lol!!


 Mini me Aprons

I had an apron from the dollar store, which was used by my nephews but they have since outgrown them.  So I just used that one as pattern.

I selected the fabrics I wanted to use from my fabric stash and got to work.  

1. I folded the fabric in half and the pattern in half.
2. I then aligned the folded edges together and pinned the pattern to the fabric.
3. With chalk/marking pen I made dashes all the way around the pattern, I used a 1/2 inch allowance.
4.  Then cut out the piece that I would use.


Now to make the bias tape.  I really wish I had one of those handy bias makers.....I think I need to give some hints to hubby. 

1.  I used the left over fabric and cut about 3 x 170 inches of strips.  
2. I just cut the strips ironed and sewed them all together to get the 170 inches.
3. Then fold the edges into the center, ironed and then folded that in half then ironed again.


Now to sandwich and pin the bias tape onto the edges. So basically 4 pieces of bias tape will be sewn onto the apron. Top, bottom and the two arm sides.
1.  Pin along the bottom, you can see I got a little pin happy!  Cut at the edge.
2. Pin along the top neck area and cut at the edge. 
3. Now sew these two part onto the apron.  I used the regular foot and sewed as close to the edge.
4. Now using the left over bias tape, you want to make two even pieces.  So fold it in half and cut.  These will be used as the neck tie and waist tie.
5.  Arrange these two along the arm area of the apron. 
6.  Starting at the very end sew along the edge and continue around the arm area to the other end.


Here is the finished product. 


These are very simple to make, and one could make them more festive or fancier.  Add pockets or ribbons.  You could do anything.

Everyone have a fabulous week.

Pin It

Thursday, July 11, 2013

I'm baaaaaack..... kind of!!

Well, well, well......seems like forever since I've been on here.  I know my last post mentioned I was taking a small break and working on some stuff.  I promise you I was!
 
One of the projects I was working on was my very own personal project......
 
Growing my very own little baby!!


These past couple of weeks have been a non-stop exhaustion, eating at all hours of the night, drinking lots of water, and peeing about 100 times a night! But I know it will all be worth it.
 
We are extremely excited and can't wait to meet him or her.  Of course I want a girl and theHubs wants a boy.  I have a feeling I'm having a boy, but I had a dream the other night that the doctor told me I was having a girl.  Either way we are beyond happy to be starting our family.
 
After we find out the gender I will sew more for baby.  I'm ready to start on those projects.  Time is moving too fast.  Before we know it, it will be January and the baby will be here.
 
I hope to be getting my energy back soon, it's sad how tired I am.  Honestly I'm just too tired to think straight much less post on the blog or even Facebook.  One thing I have been doing is playing the devil of a game Candy Crush.  It has been there on those sleepless nights when I just can't seem to sleep.
 
I hope everyone is having a fabulous week so far.  I hope to do more posts this weekend. 
 
TTFN.....


Pin It

Wednesday, May 29, 2013

Words and Pics Wednesday!

Hello to all of you lovely readers that still follow along.   I took a small break from blogging.  I had to finish up the semester, which I finished with a super awesome (A) in the class!!  These last two semesters were very stressful.   But I did it!

I've also been sewing- working on some new stuff and also a little project that I'm doing for my niece.  She asked me to take her daughters crib bedding set and make it into something more "big girl".  Her room will still be the same theme, sooooo I'm just trying to figure out what I should make.  I'm sure I'll come up with something.

Well since it's Wednesday I'm sharing some pictures off of my Instagram. 
 
"Words and Pics Wednesday"
 
These are just a couple from the past weeks....

This is theHubs grilling for us on Sunday, we had a great Memorial Day weekend!

What a great Memorial weekend to have some of my nieces and nephews over for some fun in the shade....lol!!  The sun was hiding on Saturday!

A few pics from my craft room.

Okay, I live in TX and we have Buc-ee's and I love their banana/wafer pudding!!!! There I confessed it!

These are the fur-babes and they are always having staring contests!
 
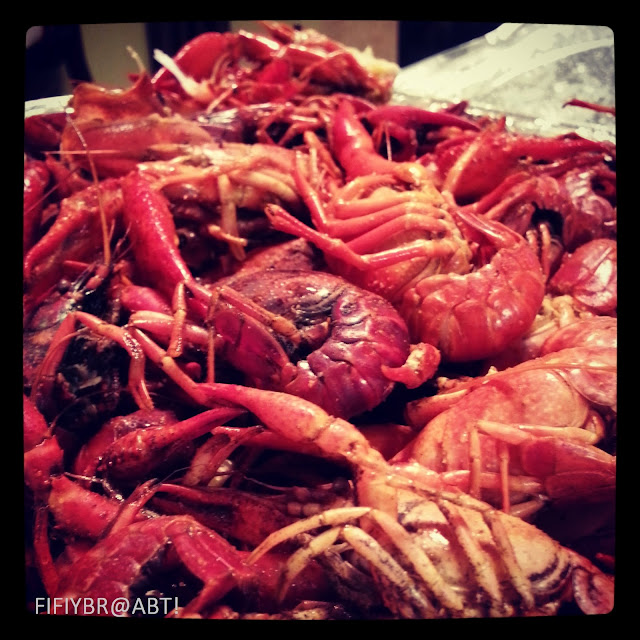
Crawfish season is almost to an end.....soooooo I am getting my fill whenever I can.  Which is usually every weekend and 1 day during the week!!  I'm the Crawfish Queen!

This is Stella and as you can see she isn't too thrilled to be taking a picture!!
 
My crazy family!!  We were having a crawfish boil out on our brand new patio.
 
I have the most amazing Hubs in the world!! He made us breakfast!

 
This is Ms. Betty and she LOOOOOVVEEESS ketchup.  Not any ketchup but the fancy ketchup from Whataburger!!  Yup she's crazy!
 
 
It was great to post, I'll be sure to get back on here soon! 
Everyone have a fabulous week!


Pin It