Showing posts with label fabrics. Show all posts

Sunday, July 14, 2013

Mini me aprons!


Why is it that everything that comes in a tinier version of something is so cute?

Here I'm sharing some child aprons that I made for my nieces.  I do holiday crafts with them and we don't want to get their clothes all dirty.  These aprons are just simple plain cotton aprons, no sewn on flowers or ribbons or anything fancy. They will be and have been stained with paints, glues, glitters, inks, flour, frosting.....everything.  I didn't want to make them where I would be worried or upset that they had gotten them dirty.  I made these aprons last year, I just hadn't had the time to make any post about it.  Since I don't have anything else ready with pictures and such, I thought I would post it now.  Sorry for the awful pics., these were the only ones I had for this project.  Plus I like to sew in the dark with just my lamp on, lol!!


 Mini me Aprons

I had an apron from the dollar store, which was used by my nephews but they have since outgrown them.  So I just used that one as pattern.

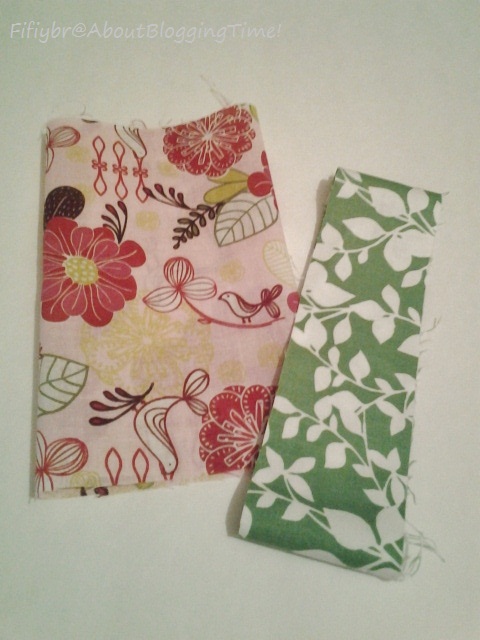
I selected the fabrics I wanted to use from my fabric stash and got to work.  

1. I folded the fabric in half and the pattern in half.
2. I then aligned the folded edges together and pinned the pattern to the fabric.
3. With chalk/marking pen I made dashes all the way around the pattern, I used a 1/2 inch allowance.
4.  Then cut out the piece that I would use.


Now to make the bias tape.  I really wish I had one of those handy bias makers.....I think I need to give some hints to hubby. 

1.  I used the left over fabric and cut about 3 x 170 inches of strips.  
2. I just cut the strips ironed and sewed them all together to get the 170 inches.
3. Then fold the edges into the center, ironed and then folded that in half then ironed again.


Now to sandwich and pin the bias tape onto the edges. So basically 4 pieces of bias tape will be sewn onto the apron. Top, bottom and the two arm sides.
1.  Pin along the bottom, you can see I got a little pin happy!  Cut at the edge.
2. Pin along the top neck area and cut at the edge. 
3. Now sew these two part onto the apron.  I used the regular foot and sewed as close to the edge.
4. Now using the left over bias tape, you want to make two even pieces.  So fold it in half and cut.  These will be used as the neck tie and waist tie.
5.  Arrange these two along the arm area of the apron. 
6.  Starting at the very end sew along the edge and continue around the arm area to the other end.


Here is the finished product. 


These are very simple to make, and one could make them more festive or fancier.  Add pockets or ribbons.  You could do anything.

Everyone have a fabulous week.

Pin It

Wednesday, January 30, 2013

Busy little fingers.....

Is January really over....

Well I'm off to a busy start.  Lots of sewing happening... a new semester at school has started....new construction going on in our home and life is continuing. 

Thank you to everyone who stopped by and left sweet comments for my bibs and burp cloths. Thank you for the features as well.  These were my most pinned item ever.

I'm still sewing, here is a sneak peak of what I've been working on this week.

 I never sew for boys....so I was super excited to finally do something boy related.


How cute are these prints


Again I used soft white terry cloth for the backs.  I will show off everything that I made for this gift set.


Pin It

Sunday, August 5, 2012

I felt like I was sewing foreeeeeeeever!

Not really, it actually didn't take that long, it was the prep that took a while.
I must say you will be bombarded with a ton of pics.....sorry for that.  I'm a visual person, I like to see pictures and I feel that you will understand it better if you can see what I'm seeing.  I'm a weirdo like that, when people talk I have to see their mouth moving, if not all I hear is mumbles. LOL!!

Okay, now on to the project.  I have been wanting a mat for the entrance to my craft room.  Why you may ask....oh just because.  Well I went on a adventure looking for the right materials to make it.  I definitely didn't want to spend lots of money and I knew I wanted something handmade. By me, duh!! I went to Goodwill, sadly I couldn't find anything that I was totally in love with.  Now I realize I could have gone to Wally World to buy a cheapie for 5 bucks, but what would be the fun in that.  Then I went to $ tree and bought 200 feet of poly rope.  That cost me about 4 bucks. 

When I went to another Goodwill, I found this twin sheet for 3 bucks, it would have to do.  All the way home I thought about how I could snazz it up a bit.
I decided I would make some of the colors pop.  Boy, was I in over my head.   With 3 fine tip markers I went about my merry little way and outlined the green, pink and dark pink prints.  For this twin size sheet it took me 6 hours to finish!
Can you see the change?  It went from Dull to Cheery!
After the (6) hours, my fingers were cramping, my neck was aching from looking down and I had a headache from the permanent marker smell....but I was happy to be done with that.  Now I was ready to cut and tear.  What??  ←  that's what theHubs said....after all that you're going to cut it up.  Yup!  I took the pinking sheers and snipped about every 1 inch along the edge.  Then I just ripped it into what you see below.
Sorry, I didn't take a picture of the part where I tied the end of the rope and the end of the strip together.  Then I wrapped the rope a couple of times to cover it.  To start off the mat I folded the start of the wrapped rope down about 2 inches  (like this ║) then I sewed it together.  Then I just continued wrapping, turning, and sewing.
I used a zig-zag stitch for the whole mat.  I kept the center of the rope and the center of the foot aligned so I could get the zig-zag on both sides.  (╥)
Okay, I'm a lefty and I do most things backwards!! Lol!!  Well, this was totally my fault for not thinking this through.  I'm so impatient sometimes and I pay for it with mess ups like this.  When I was done with my first 50 feet of wrapped rope....I had a curving bowl mat......NOOOOOOOOOO!  Yeah, instead of running it through and turning left I was turning right.  So hence the almost bowl.  I had to start again and I did it correctly.  I took the seam ripper to the bowl and used this piece at the end.  So, it worked out.
See, I'm doing it the right way here!! 
Please ignore the Hobbit feet below!!  Geez, they look like stand in feet for the Lord Of the Rings movies, lol!!  There are shadows around, I don't have cankles okay! My feet are little and cute...so theHubs says, lol!! I love to stand on it barefoot because it's always cool. 
I really love the way it turned out!  Even though it did take the (6) hours to add the color I'm glad I did....it pops right?
I'm really tempted to make a bigger one...who knows maybe I will!  So in total it cost be less than $8.00 and my time. 
I'm glad you stopped by to check out the latest project.  Everyone have a great week.


Linking up at the fabulous parties in my party tab and also at these great places -
Craft-O-Maniac
Watch Out, Martha!
Fine Craft Guild

Pin It

Monday, May 28, 2012

New Summer Tote Bag!

It feels like Summer is already here in Texas.   We've had some days in the 90s, thank goodness there has been a breeze on the days we've had to be outdoors.  I probably would have melted, lol!  One of those breezy days was on Saturday.  It was for my niece's daughters 1st birthday.....so I guess that would make her my great niece....wow that made me feel old.   I can't be a great anything at 32..... (*_*).

I love making things for people....especially my family and especially for sweet baby girls that turn one!!  Once they're one I feel like they need a new bag instead of a big ole bulky diaper bag.  Plus this bag is big and deep enough to carry diapers and wipes and whatever mom needs to carry.

This bag was one of my favorites to make.  I love the green and pink colors.  


I'm not going into too much detail about how it was made.....check out my tote bag tutorial if you'd like.


Pockets sewn on, straps ready to be put on.


I always add a extra little some to the bag.  So I made this cute little stuffed "K" for her name.


See...cute huh!


Love, Love, Love it!!  


Here's the inside!


Now, since it was for her birthday the gift of the tote bag doubled as a gift bag.....everyone loved it!  Here it is filled with her gifts - clothes, a stuffed animal and a lady bug.   Ladybug is her nickname and that was the theme of the party.  I am a rebel when it comes to themes or registries....I hate them and I will give what I want.  So if they don't like it...oh well take it back...that's just me! (",)  But since I was in a good mood, I added the little lady bug, plus it was cute.


Here it is ready to be given away to the birthday girl!


Thanks for stopping by and checking out my weekly project!

Have a great week everyone.


Pin It

Monday, April 16, 2012

Scrap Busting - Wristlet Clutch...(sounds fancy huh?)

I've been scrap busting for a couple of weeks now and these have been my favorite project to sew.  I was happy to have enough of the dark fabric to make 4 wristlets.....yay!!  I'm only showing 2 because I had about 3 zillion pics and I didn't want to have a picture show post.  I'll post the other two at a later date.  I'm very happy with the finished product.


Here you can see some of the details of the flowers.  Which were bits left over from some of the tote bags that I have sewn. If you look closely  the centers of these flowers are a bit raised...using scrap batting that I shredded, I just stuffed it into the center and finished sewing around the flower.  Then I folded this piece in half and rubbed it together to give it the frayed edge.


Same thing on this one, stuffed the centers and sewed around or overlapped the next flower or shape.


Since I am hoarder saver of many, many things....I was able to recycle the zippers and metal loops from a book bag that I had.  Yay for Fifi!!!  If I can reuse it I will.  I also sewed in a little pocket on one side and my tag on the other side.  I say if you made it, tag it! So when your out and about, people will ask where did you get it from.  You'll say "oh I made it" and they'll be all oooohhh and ahhhh! It's nice to be noticed.


Hope you've been enjoying my scrap busting projects.  


Thanks for stopping by.  Leave comments, let me know what you think!  

Everyone have a great week!

******Yes, I know I misspelled wristlets in the title. I'm just not sure if I fix it, it will mess up all my link ups.  So it will stay as it is.
******fixed it...I hope it works.


Pin It

Tuesday, March 20, 2012

New Accessories to wear

I've been a busy little bee!  Before I get to what I've been up to I have a rant...just a little rant and it's not bad.  
Here it goes - I luuuuuuuuuuuuuuuurrrrvve -> (that's LOVE in the crazy language) to wear accessories. Earrings, necklaces, bracelets, broaches, scarves, hair flair everything!  Buuuuutttt this rant is about bracelets,  I don't know about you but I have come across some really cute bracelets {not the elastic stretchy kind}. I go to try them on and guess what....it doesn't go over my Fiona/Shrek hand....I mean who are the models for these things - skeletons...because I could barely get it over my fingers.  Okay I do have a pretty wide knuckle  maybe about 3 ½ inches.  Is that really big?  I don't think so, but whatever...my point is they don't fit.  I have to put the cute bracelet back and pout about how my sausage fingers barely made it through the bracelet. So I've come to my solution - buy stretchy or cuff bracelets oooooorrrrrr I can make them myself. 

Now I can show you what I've been up to.


I'm glad I have tons of scrap fabric to use.


 I'm going to make like a million of these bracelets!


Yup....in every single color too!


The green one above is by far my favorite!!! And guess what....they slip over my hand easily.  I love them and I am really happy with the results.

Thanks for stopping by, I hope you like them.


Pin It

Tuesday, January 10, 2012

Busy in the craft room - making stuff like Pillowcase Dresses

These little sausage fingers have been busy at work! Pillows, dresses, refashions - they're tired! 

Well I made this cute pillowcase dress using bandanas.  Super easy to make! Everyone makes them and there are tons of tutorials out there. If you would like a tutorial let me know and I'll post one showing how I make them.  I made this one for my besties 9 month old, the tote bag I made late last year was for her 13 year old and she loved it!

 I want kids so bad!!  I love making these little dresses.  I know I would enjoy making clothes for my baby!

Can I just say I want a pillowcase dress too!!  How cute is this? 


2 bandanas, 1 piece of ribbon and voila this cute dress
Chose this color ribbon!

I also made a little hair clip to match.
I made it, so I tagged it! (duh)


I think I'm gonna make a few to sale at the monthly open-air craft show that is in our area of town.  If you saw this would you buy it? 


linked up at Today's Creative Blog here

Friday, January 6, 2012

1 week down, 51 to go! 2012 is going to be great!

**updated pic of finished pillow added


Wow...what a year, I mean week!  lol!  I hope that everyone had a super awesome New Years Day!!  We hosted about 20 people, adults and children this year. We were all very excited to pop fireworks since we had a fire ban in place since before July 4th. So we all kind of went crazy buying tons of fireworks.  It was pretty awesome, most of the neighbors were out as well so it was quite a show that night.  Looking forward to many great things this year.

This 1st week of the year has been wonderful.  I have started on a lot of new sewing projects.  Lots and lots of cutting has been going on in the craft room. I'm going to be trying a lot of new techniques and skills.  I don't ever really follow patterns or measurement....which can be good and bad! It's always in my head....I'll cut something then measure and write it down. I usually can never find the piece of paper I wrote it down on...so I guess that's the bad part. I try it out first to see if I like it, if I do I'll do it over to make it look neater and more aligned. 

Right now I'm trying my hand at Cathedral Window's.  I've seen this done for quilts, pillows or bags.  they are all very lovely but I feel like the fabric used makes it seem "old".  I want to make it look modern. I hope I didn't offend anyone. 

I have a stack of scrap circles that was to be used for making Yo-yo's, but I stole some and have been putting them together.  I put together some reds, blues and denim circles. Again this is my first time doing this, so it's not the greatest.  When I'm done sewing the curves down I'll sew it into a throw pillow.

I LOVE red!

I guess if I were to measure correctly, this would probably look much more aligned.

It looks a little better with the curves that are sewn down.

I'm still not too sure if I liked sewing these....it just takes too long.  I like quick results. lol!  But, I'll just have to work at it I guess.  Leave comments and let me know what you think.  I'll post updated pics when I'm finally done.


**updated pic added


Linking up at Today's Creative Blog here

Monday, December 19, 2011

Finished project - New Tote Bag!

Hey everyone....


Can you believe that this weekend is Christmas already!!  I can't....it's coming too fast!  Where's the pause button?


Well here is a semi-tutorial for a simple tote bag.  Everyone one can make bags, well at least I hope you can. So I won't bore you with too many details, I'll just make you go insane with all the pictures!! hahaha!!  If you haven't noticed already, I like to post lots of pics. I'm not that much of a writer so I post pics, duh!


Here is a tote that I've been working on for a while, only because I have had so much stuff to finish.  This is a birthday present for my besties daughter. Which I call my fake niece....I'm her aunt but not by blood! Her birthday was on Nov. 29, so yeah I'm pretty behind on it! I guess it's gonna be a Christmas gift now. lol!  She turned 13 years old, oh my....where have the years gone?  Now I do feel old. 

Many people sew totes differently, I usually sew mine 2 different ways. I always get compliments. Which is a good thing!

Here are the 2 ways I sew totes:

1) I sew 1 outside shell with gussets, 1 inside shell with gussets. then fit the shells together and sew the top, pockets and handles. It can be reversible.
2) I sew 1 outside and 1 inside together to make a wall, then sew both walls together, make the gussets and expose the guts (seams) as like to call them. If the inside is a solid color the exposed seams give it a pop of color when you open the bag. I'll have to post a pic so you can see what I'm talking about.  


Totes can come in all shapes and sizes, shore and wide, tall and skinny.  So it's up to you to decide those dimensions. 

On to the bag!!
  •  I cut out 4 pieces for the bag (2 for in/2 for out) and 4 pieces for the pockets (2 for in/2 for out).  I cut out 2 strips for the handles. I cut out 2 pieces of interfacing for the bag, 2 for the pockets and 2 strips for the handles.


I ♥'d this fabric!! Her mom helped me pick it out.
I made my pockets. 2 pocket pieces and interfacing.
I found my center and sewed my pocket onto one of the outside  pieces.
Sew up the outside pieces, right sides facing each other.

  • After sewing a 1/4 inch seam, I open and press the seams. I do the sides and the bottoms.  Then I open the corners to make my marks for the gussets.


ironed

Measure 2 inches down from the tip.
Can you see my chalk line?
I have no idea why this pic is upside down!!
Well I just cut the triangle off. I usually leave about a  1/4 inch.
Here is the outside shell turned right side out.
  • The following pictures just show me doing the exact same thing as above just adding the interfacing to the inside shell.

Measure, find my center and sew.
Put the two pieces together, right sides facing each other.
Then sandwich with the 2 large interfacing pieces, then sew.
I pressed seams, added the gussets and cut.
This shell doesn't have to be flipped.

  • Now that the shells are done, insert the inside shell and fit it together. Now I'm ready to fold and press the top down and get it ready for the handles.


Fit the shells together.
Fold down about 1 inch, then press.  Then another fold and press.

  • Take the strips for the handles and fold and press like you would while making a binding, press interfacing down the middle.

Fold and press
Folded and pressed, ready to sew the sides.
Sew down one side.
Flip over and sew down the other side.

  • Now that that's done I'm ready to sew on the handles. Flip tote inside out and get a couple of pins to secure the handles in place.


I align the handle with the side of the pocket, push the edge of the handle up the folded top.
Secure with a pin and sew my 1st line. (the bottom of the fold)

Fold over the handle and sew the second line. (the top part of the fold)

Done!! Now turn right side out and admire!!
(this is not the best pic, but  you can see  the inside!!
It can be used either way. I ♥ reversible!)

I really like the way this tote came out....the colors are awesome!! Perfect for a 13 year old.