Showing posts with label color. Show all posts

Wednesday, February 13, 2013

Pictures and Words Wednesday!!


A person that sews can never, I repeat never have too many pins!!


I hope everyone is having a fabulous week.  Also want to welcome all the new readers to my page!!
Pin It

Sunday, August 5, 2012

I felt like I was sewing foreeeeeeeever!

Not really, it actually didn't take that long, it was the prep that took a while.
I must say you will be bombarded with a ton of pics.....sorry for that.  I'm a visual person, I like to see pictures and I feel that you will understand it better if you can see what I'm seeing.  I'm a weirdo like that, when people talk I have to see their mouth moving, if not all I hear is mumbles. LOL!!

Okay, now on to the project.  I have been wanting a mat for the entrance to my craft room.  Why you may ask....oh just because.  Well I went on a adventure looking for the right materials to make it.  I definitely didn't want to spend lots of money and I knew I wanted something handmade. By me, duh!! I went to Goodwill, sadly I couldn't find anything that I was totally in love with.  Now I realize I could have gone to Wally World to buy a cheapie for 5 bucks, but what would be the fun in that.  Then I went to $ tree and bought 200 feet of poly rope.  That cost me about 4 bucks. 

When I went to another Goodwill, I found this twin sheet for 3 bucks, it would have to do.  All the way home I thought about how I could snazz it up a bit.
I decided I would make some of the colors pop.  Boy, was I in over my head.   With 3 fine tip markers I went about my merry little way and outlined the green, pink and dark pink prints.  For this twin size sheet it took me 6 hours to finish!
Can you see the change?  It went from Dull to Cheery!
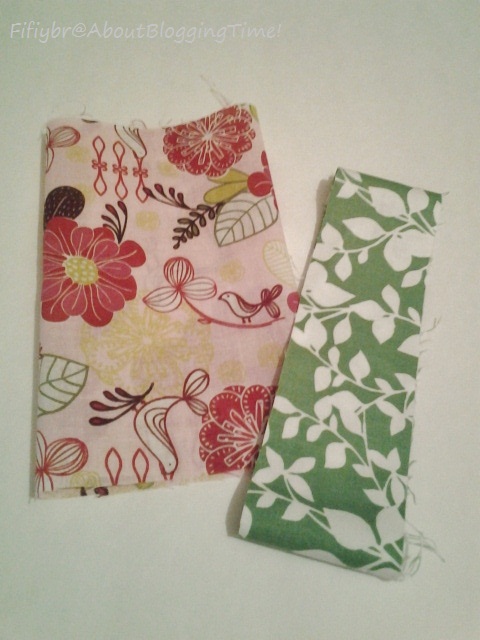
After the (6) hours, my fingers were cramping, my neck was aching from looking down and I had a headache from the permanent marker smell....but I was happy to be done with that.  Now I was ready to cut and tear.  What??  ←  that's what theHubs said....after all that you're going to cut it up.  Yup!  I took the pinking sheers and snipped about every 1 inch along the edge.  Then I just ripped it into what you see below.
Sorry, I didn't take a picture of the part where I tied the end of the rope and the end of the strip together.  Then I wrapped the rope a couple of times to cover it.  To start off the mat I folded the start of the wrapped rope down about 2 inches  (like this ║) then I sewed it together.  Then I just continued wrapping, turning, and sewing.
I used a zig-zag stitch for the whole mat.  I kept the center of the rope and the center of the foot aligned so I could get the zig-zag on both sides.  (╥)
Okay, I'm a lefty and I do most things backwards!! Lol!!  Well, this was totally my fault for not thinking this through.  I'm so impatient sometimes and I pay for it with mess ups like this.  When I was done with my first 50 feet of wrapped rope....I had a curving bowl mat......NOOOOOOOOOO!  Yeah, instead of running it through and turning left I was turning right.  So hence the almost bowl.  I had to start again and I did it correctly.  I took the seam ripper to the bowl and used this piece at the end.  So, it worked out.
See, I'm doing it the right way here!! 
Please ignore the Hobbit feet below!!  Geez, they look like stand in feet for the Lord Of the Rings movies, lol!!  There are shadows around, I don't have cankles okay! My feet are little and cute...so theHubs says, lol!! I love to stand on it barefoot because it's always cool. 
I really love the way it turned out!  Even though it did take the (6) hours to add the color I'm glad I did....it pops right?
I'm really tempted to make a bigger one...who knows maybe I will!  So in total it cost be less than $8.00 and my time. 
I'm glad you stopped by to check out the latest project.  Everyone have a great week.


Linking up at the fabulous parties in my party tab and also at these great places -
Craft-O-Maniac
Watch Out, Martha!
Fine Craft Guild

Pin It

Sunday, July 8, 2012

Embroidery Art - Day of the Dead Pillow

 Where has the year gone?  Can you believe by the end of this week we're already half way through July.  I'm already counting down till we get to October.....I can start decorating for the Holiday's. Woo-Hoo!!!

This project that I'm going to share with you was for one of our great friends Birthday.  Her lovely parents were the lucky ones to receive the Patriotic Pillow.  I want to thank all of the lovely blogger's who featured it.  I tried to grab all of the feature buttons, if I'm missed one I'm sorry - please let me know if you don't see yours.

The theme of this pillow is a little early in the year to celebrate....that is if you do! It is usually celebrated November 1st.  I don't celebrate the day, but I do love the art work of everything.  Some of the art work is simply stunning. If you like that sort of thing. I went on-line to get some inspiration for this project.  If you look up Day of the Dead art, you'll see skulls with flowers, hearts, webs, crosses and swirls, in many different colors.  Well my friend LOOOOOVES this kind of stuff and I knew she would be extremely happy when she saw what I made for her.

Here is some information on Day of the Dead History

(Picture quality is not the best, but I'll try to explain as best as I can.)
1.) I folded a sheet of paper and drew a couple of half skull shapes.
2.) Then I cut them out and decided on the one I liked the best.
3.) I traced (2) skulls on a sheet of blank paper and made copies of that.
4.) Then with the inspiration from the net, I drew out the skulls.  You know it's not very easy to draw teeth.  I had such a hard time, I kept drawing and erasing. 
1.) I ended up drawing (8) different skulls, I chose the 4 I liked the best.
2.) I pinned the skulls onto foam board with tissue paper over it to trace.
3.) I then traced the skulls with black permanent marker.
4.)  I cut out the tissue traced skulls and set them aside.
5.)  Now I was ready to start.  I pinned it onto the fabric, then put it onto the hoop. 
       Embroidering on the tissue paper was easy, I was able to tear away and pick out the pieces.  I didn't really have a plan, I just picked different colors.  As I finished each skull I took it off the hoop to pin the next skull where I wanted it to be.  I really loved the way it all came out.
Drawing out the skulls, embroidery and sewing took me about 27 hours combined....it probably would have been less if I wasn't watching re-runs of Ugly Betty or The Office, lol.
For the back I chose a black with white polka dots.  I have to say my favorite skull has to be the last  one with the blue flower.

  I'm happy to say that she was really excited to receive this gift.  I'm glad!!

Thanks for stopping by to view this weeks project.

Everyone have a fabulous week.

Linking up Here and


Pin It

Monday, June 18, 2012

Spray Paint project!


I spray paint!!!  Why, because this stuff can pretty much change anything into something pretty to look at.  Frames, furniture, glass, even shoes!!!!  I'm still trying to convince theHubs why I have so many spray paint cans or why I keep buying more....lol!!

I spent one of these past Saturdays spray painting outdoor plant pots.  They were due for a upgrade.  When we first moved into our new home we had no plants what so ever, the front door looked sad and lonely.  My mother-in-law gave me this potted plant, it is a type of Ivy.  The pot was painted white, probably with house paint not sure and after 7 years the paint has chipped away.  I sanded down as much as I could as you can see from the picture below.


It's no secret, I love easy projects.  This was super easy too!  I didn't remove the plant, because I was lazy and I said I loved easy projects.  So I just covered the plant with a plastic bag, tucked in all the long Ivy arms and pushed wooden skewers in around the bag so I wouldn't get spray paint all up in there. 

Ta-da!!  Fresh and white! 


I picked up this salmon colored pot at a garage sale for $1.00, yay!!  I washed and dried this baby and it was ready to be painted.  I loved the shiny color it had, it just didn't go with the outdoor color of the house.  So I just chose another shiny color to make a statement in the entry way.   


LOVE IT! Who doesn't love a nice turquoise?


Now, they are ready to show off!


I just put them here to take the picture.  They have since been moved, the blue one is on the walkway now.  

Everyone have a fabulous day, stay cool if it's hot out or stay dry if you're getting the rain! 

Pin It

Monday, June 11, 2012

The jeans, the holes and the repairs.

My goodness I have been a slacker with my posts.  I try to post a project every week, but my mid week posts have been sad and lacking.  I guess I'm in a funk....I don't know.  I just haven't had anything that's really exciting going on.  Well besides my weekly projects My weekends are filled with birthday parties, different events that our family is having....this past Saturday was the first free Saturday that I've had in a looooooong time. I am super tired, so I took advantage.  It was really nice to not have to worry about stuff.  

I can definitely feel the Summer coming, It's hot now and I don't feel like doing anything!!  Sunday I was in the yard and just about passed out.....that's no fun.  I told theHubs I can't wait for the Fall to get here.  Which really isn't saying much for the Gulf coast of Texas.  I meant slightly cooler Fall weather.

Okay, enough blubbering from Fifi.  Here's what I worked on with my new embroidery floss.  My niece has a favorite pair of jeans...she luuuurrrves them! A lot!  The only thing wrong with them is the holes...or the ever soooo present cool looking "hey I paid mega bucks for my jeans to look like they were run over by a tractor, slept with the pigs and chewed up by goats" look.  I have no kids but I have teen nieces and nephews and some of these clothes they buy is crazy expensive and they look horrible.  I know I'm not the only one to think that, Right?   Well she asked if I could do something about fixing a couple of holes with patches.  Since she knew she could never wear them to school showing skin on her thigh or her knees.  I told her I'd see what I could do.  I didn't want to do iron on patches.... lame-o, and I couldn't fit the legs onto my sewing machine. 

So, I decided to add some embroidery!

oh....the pretty colors


I found some scraps that were cute in color and big enough to fit into this small hoop.  Getting the hoop on was a bit of a challenge....this girl has some skinny legs...lol!!


Once the hoop was on, I decided to draw something out on craft paper, I decided on a heart. 


 I cut it out and pinned it to the jean where I wanted to have it. This patch is just under the pocket on the thigh.


I made a stem stitch for the heart and little blue knot stitches for the bottom part of the patch.  You can see that the heart was not big enough for the whole patch. I did that on purpose....I drew a bigger heart but it just didn't look right.  Not for the slim leg jean...this narrow heart worked perfectly.


See the little knot stitches?  Well I'm sure you do.  I didn't take pictures of the knees but I did this knot stitch there too.


I'm really happy that she loved it.  I'll have to get a picture of them on her.

This has been the project for the week....I have some other stuff that I'm working on.  I hope to get those posted up soon. 

Everyone have a wonderful week and thanks for stopping by.


Pin It

Monday, June 4, 2012

Floss much? Okay that was corny...lol! I made Embroidery Holders

I am soooo late with this post.  I guess I should have probably checked that I actually hit the publish button!  Oh well  it's up now.

Well this post is a half Friday find and a half DIY project.  It's a very easy peasy mac n cheesy kind of project.  The best thing about this project is how simple and practically free it was.

Here is the part that's a Friday find.  Ooooooo colors!!!  I found this colorful box of embroidery thread for less that 5 bucks!!  Yes, you read correctly less than 5 bucks.   There are 105 skeins of thread, 5 for each color, can you say score!  I will be going back to check if there are more in different colors.  This box was labeled "Bright Colors"  and it was to make bracelets.   I said nuh uh -  I'm making something else.  I could not pass it up. 

Don't they look lovely, all neat and in order?

Ok, now for the little DIY project....that was free and easy to make.  I used my pinking shears, some cardboard scraps and cut 2" x 3" little rectangles.


Then I made a little snip near the top.  Be sure to not cut too close to the top.


Then I took this hot mess and wrapped my little heart out.  I started at the center of the cardboard piece, then wrapped and wrapped, when I was close to the end I made my way to the top, near the little snip I made.  Then I tucked the tail in.  It took just as long as making a yarn wreath, which takes about a billion years to begin with.  LOL!  


I'm glad that's done!!  Look how nice and neat it looks now.  I also used a marker to label the top of the cardboard with the # for the embroidery floss.  I have like 6 different blues and they all look the same to me.  The # will help when I need to buy more.


I know that stores sell the holders for this, but I like it better this way.  If you look closely, I cut tall and short cardboard pieces and used some clothes pins.
1.  I was able to use cardboard that was destined to fill the garbage can.
2.  Free, free, free
3.  Hellooooooo it's cute! 


Aaaaaaannnnnnd, the little basket was a Goodwill find for
Dunnn, dunnn, dunnnn  .67 cents.


Okay, enough of my babbling I hope you have a fabulous day.

Thanks for stopping by.


Pin It

Monday, May 28, 2012

New Summer Tote Bag!

It feels like Summer is already here in Texas.   We've had some days in the 90s, thank goodness there has been a breeze on the days we've had to be outdoors.  I probably would have melted, lol!  One of those breezy days was on Saturday.  It was for my niece's daughters 1st birthday.....so I guess that would make her my great niece....wow that made me feel old.   I can't be a great anything at 32..... (*_*).

I love making things for people....especially my family and especially for sweet baby girls that turn one!!  Once they're one I feel like they need a new bag instead of a big ole bulky diaper bag.  Plus this bag is big and deep enough to carry diapers and wipes and whatever mom needs to carry.

This bag was one of my favorites to make.  I love the green and pink colors.  


I'm not going into too much detail about how it was made.....check out my tote bag tutorial if you'd like.


Pockets sewn on, straps ready to be put on.


I always add a extra little some to the bag.  So I made this cute little stuffed "K" for her name.


See...cute huh!


Love, Love, Love it!!  


Here's the inside!


Now, since it was for her birthday the gift of the tote bag doubled as a gift bag.....everyone loved it!  Here it is filled with her gifts - clothes, a stuffed animal and a lady bug.   Ladybug is her nickname and that was the theme of the party.  I am a rebel when it comes to themes or registries....I hate them and I will give what I want.  So if they don't like it...oh well take it back...that's just me! (",)  But since I was in a good mood, I added the little lady bug, plus it was cute.


Here it is ready to be given away to the birthday girl!


Thanks for stopping by and checking out my weekly project!

Have a great week everyone.


Pin It

Wednesday, May 16, 2012

Pictures and Words - Wednesday (i guess the opposite of Wordless Wednesday)

Well, well, well  look who decided to bloom this past weekend!!
 
My Passion flowers.
 
These flowers look absolutely gorgeous.  Sadly the bloom will only last about a day. Luckily there are tons of buds on the vines, so I'm happy that I have been getting about 5-7 blooms everyday since Saturday.


They look like they could be from an alien planet. I know that there are about 500 different species, well according to the Internet ('~')! You know how reliable that is, lol!  Some vines will bear the passion fruit.  My vines never have, but I'm happy they don't....who knows what animals I'd have coming in my yard.


As you can tell from prior posts, I do love to be outside in the yard tending to plants.  I'm always watering, trimming and talking to them.  Yes talking....and I said I would never be a "talker" to plants but I do.  I know I'm not the only one. 

Happy you stopped by to take a look!


Pin It

Monday, May 7, 2012

Crafting the midnight away! Embroidering

Where has the year gone?  It's May and there are a little less than 2 months before the 4th of July!! CRAZY!!  We were just popping fireworks for New Years.  I really hope we don't have a ban for the 4th of July, we were on a fire ban and water restrictions last year. 

I've been busy these past couple of weeks with different projects...the sewing is easy to get done and show it off.  It's the bigger stuff that takes a bit of time - like furniture.  Slowly but surely its happening. It doesn't help that we're already getting the humidity....it's taking forever for my spray paint projects to dry.  After last years super smart idea of spray painting in the craft room and the big fail, I have to stick to the garage from now on...lol!! 

So, while the other projects get finished and pictures are taken and edited, I will show you what else I do at the midnight hour besides getting my beauty sleep.

I make things like this in bed with my lamp on because I don't want to wake theHubs.   


I made this one for my craft room!!  It's my blog name.  I hand drew the whole thing and used colored thread, it was not easy because the thread is too thin and kept knotting.  But I finished it!


This one is also for the craft room.  I used embroidery floss here.  Sometimes a gal needs some motivating words.  These are from a song...don't songs sometimes speak to you. Or don't you think wow... story of my life.  I traced the star from my lap top and wrote out the quote by hand.


The above blue one is for my side table in my bedroom....It's my wedding date.  Yes, I know the date to my anniversary, it's just a reminder of our LOVE.  Don't worry I'm not gonna talk about our gross, mushy love!! Who wants to here that!! lol!!  I used a iron on for the heart,  I couldn't draw that perfect.


Not to be rude or mean, but for a loooooooooooong time I thought of embroidering as a old folk craft...Sorry!  It was always old English letters, or the country cat that I saw and I was not interested at all.  If it was cooler or more modern maybe I'd try it.  I know now that there are about a million things that can be embroidered.  There are tons of iron ons that are cool enough for me, or I can draw whatever I want.


Well, I hope you like them.  If you've never tried to embroider give it a try...it's super easy and it's fun to pick all the colors.

Everyone have a fabulous day!!